Showing posts with label Sweet. Show all posts

Friday, May 28, 2010

Choc chip cookies continued...

Previous posts have documented a quest for the choc chip cookie to be perfected. Perhaps my problem with this quest starts with the fact that in Aus, I should be searching for a choc chip bickie not cookie!

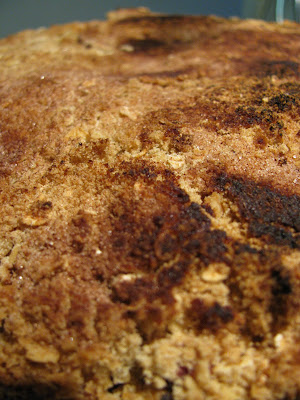
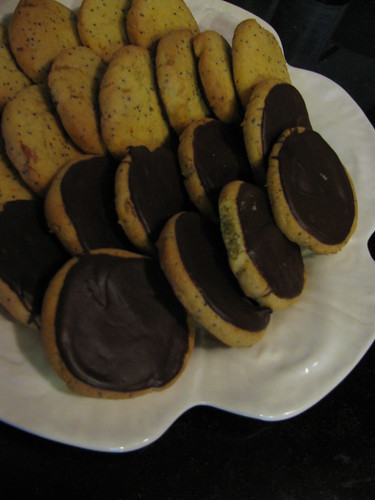
These are pretty good though. Initially whipped up by the fella when we went away for a weekend. Currently they are my go-to staples when it comes to choc chip biscuits. Are they that good though that experimenting with recipes will cease? I think not. The mix can be temperamental at times. With flat, fuzzy edged biscuits. Or hard as little frisbees if given a few minutes too long. But when they work, oh they are good!

I hope you have success with these.

Choc Chip Biscuits Take 2
Makes around 3 dozen small biscuits

125 g butter, softened
1 c brown sugar, gently but firmly packed
1 tsp vanilla
1 tbs milk
1 egg, lightly beaten
1 1/2 c flour
1 tsp baking powder
200 g choc chip bits
100 g nuts, diced (walnuts, hazelnuts, etc)

Pre-heat oven to 180* C fan-forced. Divide oven shelves into thirds. Line three baking trays with paper.

Beat butter with brown sugar. Using a mixer is ideal - give it around three minutes to be light and fluffy. Add vanilla, milk and egg, beat briefly to combine. Gently stir in the flour and baking powder. Turn off the mixer and add the choc chip bits and nuts. Stir to combine.

At this point, your biscuit mixture may benefit from a rest in the fridge to firm things up. Even 15 minutes could be good. But if it is not too soft, get on with the baking. Using a spoon, heap small rounds of mixture onto your prepared trays. They can be any size really, but I find balls around 3 cm in diameter or so work well - more than a mouthful but not a complete meal.

Cook in the oven for around 8 minutes. Check at this point and give the biscuits more time if needed. Remove and cool on the trays for 5 or so minutes before transferring to a wire rack to cool completely.

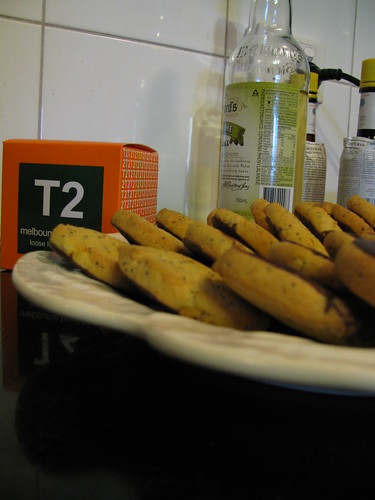
Enjoy with a cup of tea. Store in an air-tight container for up to a week. Alternatively, once the balls of dough have been formed and placed onto the trays, freeze. Once frozen, place in bags of around a dozen. Then when you need a snack, there are biscuits that only need to be cooked (or dough eaten from frozen).

Adapted from Michele Cranston's Marie Claire: Kitchen, the Ultimate Recipe Collection.


Wednesday, April 14, 2010

Old and faithful crumble cake...

I had a simply lovely baking day recently. We had gone to the markets, so there was plenty of fresh produce around. We had large fresh free-range eggs in abundance. There was so much autumnal fruit, with the last of the plums and plenty of pears. Simply delicious. I purchased a good amount of pears, raided the pantry and got cooking.

I whipped up the last post, some breakfast bars. And these have been getting us through the week. But some old and faithfuls were baked too. Banana bread, studded with walnuts, deliciously dark with cocoa. Baked in the oven until crisp on top and fluffy in the middle. What a great stand-by recipe. It is what I make when I simply have to cook but don't feel adventurous. The other reliable baked delicious thing that was made was a crumble cake.

Crumble cakes are versatile. Any fruit can be used. And the toppings can be changed depending on what is at hand. This weekend I was clean out of coconut after making the breakfast bars. So I simply added more oats and more brown sugar. As for the fruit, some rhubarb from the freezer was added to those firm and volumptuous pears.

Pear and Rhubarb Crumble Cake
Serves 12 or so

4 eggs

200 g sugar
200 g butter, melted
1 2/3 c plain flour
3 tsp baking powder
1 pear, cored and diced
handful of rhubarb, diced
crumble topping for cake
50 g butter
200 g dry ingredients - be sure to include brown sugar and flour, oats, coconut, seeds or nuts work also.
2 tsp cinnamon powder

Pre-heat oven to 170 * C. Line a large round baking tin with paper, or grease and flour to ensure the cake can be removed from the tin once cooked.

Cream together the eggs and sugar in your electric mixer until light and fluffy. Add the melted butter, mixing to combine. Fold in the sifted flour and baking powder, or simply use self-raising flour and omit the rising agent. Pour into prepared cake tin. Sprinkle the fruit over the cake mixture. Any fruit can be used really. Try two apples, peeled, cored and diced. Or some pears and sultanas. Or some frozen berries. Or diced appricots. What ever you have and love.

Make the crumble topping by combining the dry ingredients and cinnamon with the butter, rubbing the butter in with your finger tips until you have soft lumps with no real wet bits of butter. Crumble this topping over the cake.

Bake in oven for around 45 minutes. This will depend on your oven and the size of your cake pan. Cover with foil after 30 minutes if the cake is browning too quickly. Test cake is cooked by inserting a squewer into the middle. If it comes out with wet cake mix on it, return to oven to cook further.

Cook on a wire rack in tin for 10 minutes before removing from tin and leaving to cool completely.

Mum's recipe originally, which I'm sure she got from somewhere. Now my own.

Thursday, November 5, 2009

Anzacs with a twist...

Anzacs are a real Aussie tradition. They began supposedly during the first world war, when care packages were sent to the troops. As Australia is a long way from Europe, bread and other goodies tended not to last on the journey there. Rather than just send socks, the Aussie women left behind began baking using ingredients that would not perish. So no eggs, not just flour, and something that would work dipped into a hot cup of tea. Thus the ANZAC biscuit was invented. ANZAC stands for the Australian and New Zealand Army Corp, and is the general name given to the Australian war/fighting spirit. And the biscuit is a childhood staple for many.

My mother used to make Anzacs just before we got home from school. They were hot and soft and delicious. Unfortunately I was put off them after a Home Ec class in year 7 of my education. These bickies get harder the longer they are left in the oven, so hard they can break teeth. I didn't believe the teacher when she told us this, and I cooked my batch for far too long. They were inedible. And I stopped making them.

This recipe though was made before I realised what I had actually done. It was only when there were in the oven that I realised I had just created. I was shocked. No eggs, lots of flour, being held together with golden syrup. I had made the great Aussie biscuit without knowing it! It was the figs that sucked me in, if the truth be known. I love a dried fig, and wanted a "healthy" treat for a work morning tea. And thus I've been converted back to the Anzac fold - so long as there is dried fruit embedded in them!

Figy Anzacs
Makes around 16 biscuits

1/2 c. plain flour
1/2 tsp bicarb soda
75 g raw sugar
75 g oats
100 g dried figs, finely chopped
75 g butter
2 tbs golden syrup

Pre-heat oven to 170 o C. Ensure oven shelves divide the oven into thirds.
Sift flour and bicarb together into a large bowl. Add the sugar, oats and figs. Stir to combine.

In a small saucepan over medium heat, combine the butter and golden syrup. Stir occasionally and wait until they have melted together. Remove from heat and leave to sit for around 3 minutes.

Pour the butter mix into the dry ingredients. Stir well to combine. Using your hands, shape the mixture into golf ball sized rounds (or just slightly smaller). Place onto lined baking trays.

Bake in oven for 13 minutes, rotating the trays after 8 minutes of cooking time. Remove from oven, cool slightly on the tray before transferring to a wire rack to cool. Store in an airtight container.

Adapted from Delicious Magazine Nov 2003. Original recipe by Jane Clarke.

Monday, October 26, 2009

In case of an emergency, bake these!


An earthquake struck Darwin town around midnight on Saturday/Sunday. And what a shock that was! I was lying in bed reading when all of a sudden the bed started rocking. And the mirrors of our built-in robes were visibly moving, and the walls were making noises. My screams of the fella's name were futile. "He must have fallen asleep in front of the telly" was my conclusion. Nope, rather he was standing very still in the middle of the lounge experiencing the quake with all limbs extended in order to feel the full force of the earth's movements.

My worries were that I may need to evacuate the building if it got worse. How would we get downstairs? Were lifts safe to use in case of an earthquake? Would I need to get some clothes on or was it okay to be nudie while escaping a collapsing building? What would we eat for breakfast if the fridge fell through the floor to the apartment below?

Thankfully I had a roll of these orange and poppy seed biscuits stored in the freezer, perfect food to enduring an earthquake. Baking them only takes 11 minutes, and the quaking lasted almost this long. So in case of an emergency, I recommend having some of these delicious biscuits ready to go. They may not erase the embarrassment of a nudie run down five flights of stairs in the middle of a little earthquake, but they will win friend and influence people. Once your face has returned to its normal colour and the earth has opened up and swallowed you whole.

This recipe is from one of my favourite baking blog queens, Joy the Baker. She bakes, with attitude and sass. Oh how I love her recipes, and her dedication to her craft. This was one of the first recipes I tried of hers, and it is the one I come back to most often.

Orange and Poppy Seed Biscuits
Makes around 48...

2 c. plain flour
½ tsp. bicarb soda
½. tsp salt
2 tbs. poppy seeds
1 c. sugar
Zest of 1 orange
150 g. butter, softened
1 egg
1 egg yolk
1 tsp. vanilla essence
1 ½ c. chocolate bits


In a bowl, sift together flour and bicarb soda. Add the salt and poppy seeds. Stir well to combine.

In another bowl, combine the sugar and orange zest. Smash it around a little to get the sugar well into the zesty bits.

In your mixer, beat the butter for 2 minutes until soft and smooth. Stir in the sugar and zest. Mix for two minutes. Add the egg and yolk, mix until just combined. Add the vanilla and mix for a further two minutes. Reduce the mixer’s speed to low, add the flour mix until just combined.

Divide the mixture in half, shape into two logs of around 5 cm in diameter. Roll up each log in baking paper. Place in the freezer for at least thirty minutes to firm up. They can be frozen for up to four weeks, and then you are only fifteen minutes away from biscuits! Such a great idea.

When ready to cook the biscuits, pre-heat the oven to 180 ⁰C. Line two trays with baking paper. Unwrap one log, slice into 5 mm thick slices. Place onto the trays a few centimetres apart. Cook in oven for 11 minutes, rotating the trays half way through cooking. Cool slightly on the tray before cooking on a rack. Repeat the baking process as needed.

When the biscuits are cool, melt your chocolate. Using a knife, spread the bottoms of the biscuits with melted chocolate. Allow to set, maybe in the fridge if needed.

From Joy the Baker.


With tea perhaps..., originally uploaded by the_bashful_owl.

In times of trial and urgency, I also recommend a good cup of tea. Such as this Melbourne Breakfast from T2.

Tuesday, October 20, 2009

Crumbling...


Egypt: Karnak, originally uploaded by Brooklyn Museum.

Crumble (verb): break or fall into small fragments; gradually disintegrate.

At times in life, things seem to crumble. One's hopes and dreams, relationships, careers, one's health, houses, old treasures such as letters and timber items.

Crumble (noun): dish of stewed fruit with a crumbly topping.

At times in life, one needs crumble. Preferably made with apples or rhubarb. Or dotted with blueberries. Or sprinkled with almonds and dried apricot pieces. Or made with pears and strips of orange zest. And swimming with custard. Even served in little tea cups. Or spooned out from a big bowl. Mmm, crumble.

This crumble was made for a dinner we had over the weekend. I slow cooked a chicken, lemon and garlic dish, as well as roasted potatoes in the oven. Things were timed to perfection, with minimal fuss at the last minutes. But then the guests were late, around 45 minutes late. So the meal was dry and lacking in lusciousness. Hurrah for the crumble, the dish that saved dinner. As my culinary prowess crumbled around me, the crumble won hearts...

Typically I would make my crumble using sugar syrup to poach the fruit in. This method instead cooks the apples in butter, ensuring they maintain some texture as well as their shape. The port adds depth of flavour and is beautifully enhanced by the sourness of the berries. The crumble topping is how I make crumble, with lots of texture and taste. None of this breadcrumb only crumble for me please.

Apple, Raspberry & Port Crumble
Serves 6 to 8 with custard and ice cream.

20 g butter
6 apples, peeled, cored & diced into medium pieces
300 g frozen raspberries, slightly defrosted
300 ml port
185 g sugar
½ tsp ground cinnamon

Crumble topping:
60 g butter, softened
½ c. plain flour
½ c. raw sugar
½ c. oats
½ c. desiccated coconut

Pre-heat your oven to 180 ◦C.

Over a medium heat, melt butter in a large saucepan. Add the apple pieces. Stir well and cook for around 10 minutes until softened. Add the raspberries, port, sugar and cinnamon. Cover and cook for 8 minutes.

Using a slotted spoon, remove fruit from the cooking liquid and transfer to a suitable round cooking dish. Continue to cook the liquid uncovered until it reduces to a syrup-like consistency. This may take up to 10 minutes. Stir it occasionally to ensure it does not catch and burn on the bottom. Pour this liquid over the fruit.

Make the crumble topping by combining all the ingredients. Mix it together well, rubbing the butter into the other ingredients. It is messy, but easy to do with your hands. The mixture should be chunky rather than sticky, getting towards being like breadcrumbs but not smooth. Crumble the topping over the fruit.

Bake in the oven for 35 minutes, until golden in parts.

Serve hot with ice cream, warm with custard or even cold with yoghurt for breakfast the next day.

Adapted from Delicious magazine August 2007.

Saturday, October 10, 2009

Make me banana pancakes...


Do you debate it in your house? Crepes or pancakes I mean. Which is better? Who prefers what? What will be made? Growing up, my dad preferred the thick, fluffy pancake. Preferably smothered in butter, maple syrup and cream. And perhaps with ice-cream. Rather like the McDonald's hotcakes in fact. I would vote for paper thin crepes, topped with lemon and sugar. They would be rolled into a log and eaten in slices. My sister Rach was a gun at making choc-chip pikelets. Melty chocolate, smothered in dripping butter, napkins mandatory!

More recently, I have been converted to the thick and fluffy side. But with banana if you don't mind. Mmmmmm! Blame it on Jack Johnson if you will:

But baby, you hardly even notice

When I try to show you this

Song it's meant to keep you

From doing what you're supposed to

Like waking up too early
Maybe we could sleep in
I'll make you banana pancakes
Pretend like it's the weekend now...


Sure, I do only make pancakes on the weekend, so there's no pretending about that. But pancakes in our house signals a lazy morning. Waking up late, substituting breakfast for brunch. Brewing an endless pot of coffee in the Bialetti. Raiding the fridge for half-eaten jars of jam... My pick is for banana pancakes, if you please!

This recipe is from one of my most trusted cookbooks, Feast. A few alterations have been made to Nigella Lawson's original instructions. For example, she is light on the sugar. While bananas are sweet, I think a little more is needed. And how she gets 20 pancakes out of it, I'll never know. Read, make, enjoy...

Banana Pancakes
Makes 7

I ripe banana, or two if they are lying around
180 g plain flour
1 tsp baking powder
½ tsp bicarb soda
1 egg
300 ml milk
Splash of vinegar (or use 300 ml buttermilk and no vinegar if you have it handy)
2 tbs sugar
Butter, for cooking

In the bowl of your food processor, combine all of the ingredients except the butter. Blitz until smooth. Transfer into a jug and let it stand for a while. This can be done in the fridge for 30 minutes, and you will get a thick, frothy mixture. If you don’t have a food processor, mash the banana and add it to the liquid ingredients. Combine the dry ingredients after sifting them. Make a well in the middle of these ingredients and stir in the liquids.

Heat a frying pan or your trusty pancake cooker if you have one (ours was a gift that came from Aldi) to a medium heat. Grease the surface of your frying pan with butter on the back of a spoon. You really don’t want your pancakes to be swimming in butter, so this is a measured way of getting grease in without overdoing it. Pour in a good amount of batter, swirl pan around gently to dispurse the mixture and make your pancakes bigger. Cook until lots of bubbles appear and the underside is browning nicely. Flip and cook. Remove to a foil-lined plate. Keep the pancake warm under the foil while you repeat the process with the remaining batter.

Enjoy your pancakes with whatever toppings you prefer. Sliced banana and honey... butter and fig jam... maple syrup and ice-cream... lemon and sugar.